REVERSE CLIPS
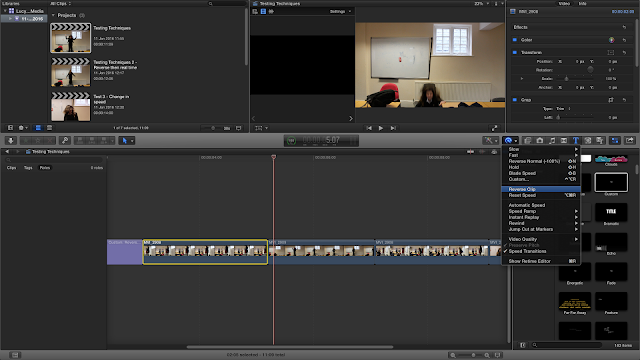
The first technique I tried was a simple reverse effect. This could be done by click the button that looks like a wand with an arrow curving over it. It opens a drop down menu where the 'reverse' effect can be selected.

Once this is selected you can change the speed of the reverse using the arrow in the green bar above the clip. For this example I kept it a 100% speed which is the normal speed.
The video below shows examples of reverse clips.
CHANGING DIRECTION
I wanted to take the previous effect further by changing the direction. For example The clip started in real time then is reversed. It then switches back to real time to create an interesting effect. This effect can be made using the same technique as before with some slight adjustments, however it can easily be created use an effect called 'Rewind'. It is selected using the same method as before - by opening up the drop down menu.
From this menu you can also adjust the speed of the rewind. For these examples I used 1x as it perfectly created the effect I wanted.
CHANGING SPEED
Using the same drop down menu as the two previous techniques, the video can be either speed up or slowed down using in-built effects. From here the amount the video is slowed down or speed up can be chosen. 100% is the normal speed, so 50% will be half that speed. When speeding up there is the choice to speed it up by 2x, 4x, 8x or 20x.
The video below shows examples of speed changing.


No comments:
Post a Comment